In most cases, classic preflighting is done on an object level. Examples are to check that the page dimensions are correct, that certain page objects are set to overprint, or that images meet a required resolution. However, there are cases where this is not the best way to get the intended results. One such case is ink coverage. To get a quick and reliable preflight result, pdfToolbox uses a different approach to check all ink related properties: Internal rendering - i.e. converting the PDF to a number of pixels. But before we go into more detail about the internal rendering process, let us have a look at some practical use cases where internal rendering gives you reliable information in a more straightforward way than "classic preflighting".
Check properties in pdfToolbox
Check properties to determine ink related parameters
Let's start with the most obvious Check property: “Effective ink coverage”. Before printing a PDF file, you may want to check whether a page is using too much ink. When printing, the ink coverage may be too high in certain areas. There is a limit to the amount of ink that can be transferred to the paper. It depends on several factors, such as the printing process or the type of paper. Ink coverage that exceeds the limit can cause printing problems because the ink won't dry properly or will stick to the next paper. The “Effective ink coverage” Check can be used to determine if the ink coverage is above a certain threshold.
Similar, but addressing a completely different use case, is the “Effective total area coverage (TAC)” Check property. This Check lets you determine the ink usage on a page as a percentage of the total page, either for all the inks in the document, but usually you are more interested in the numbers for each of the colorants separately. This gives you an idea of how much ink you will need for a particular print job.
An example illustrates the difference between these two Check properties:
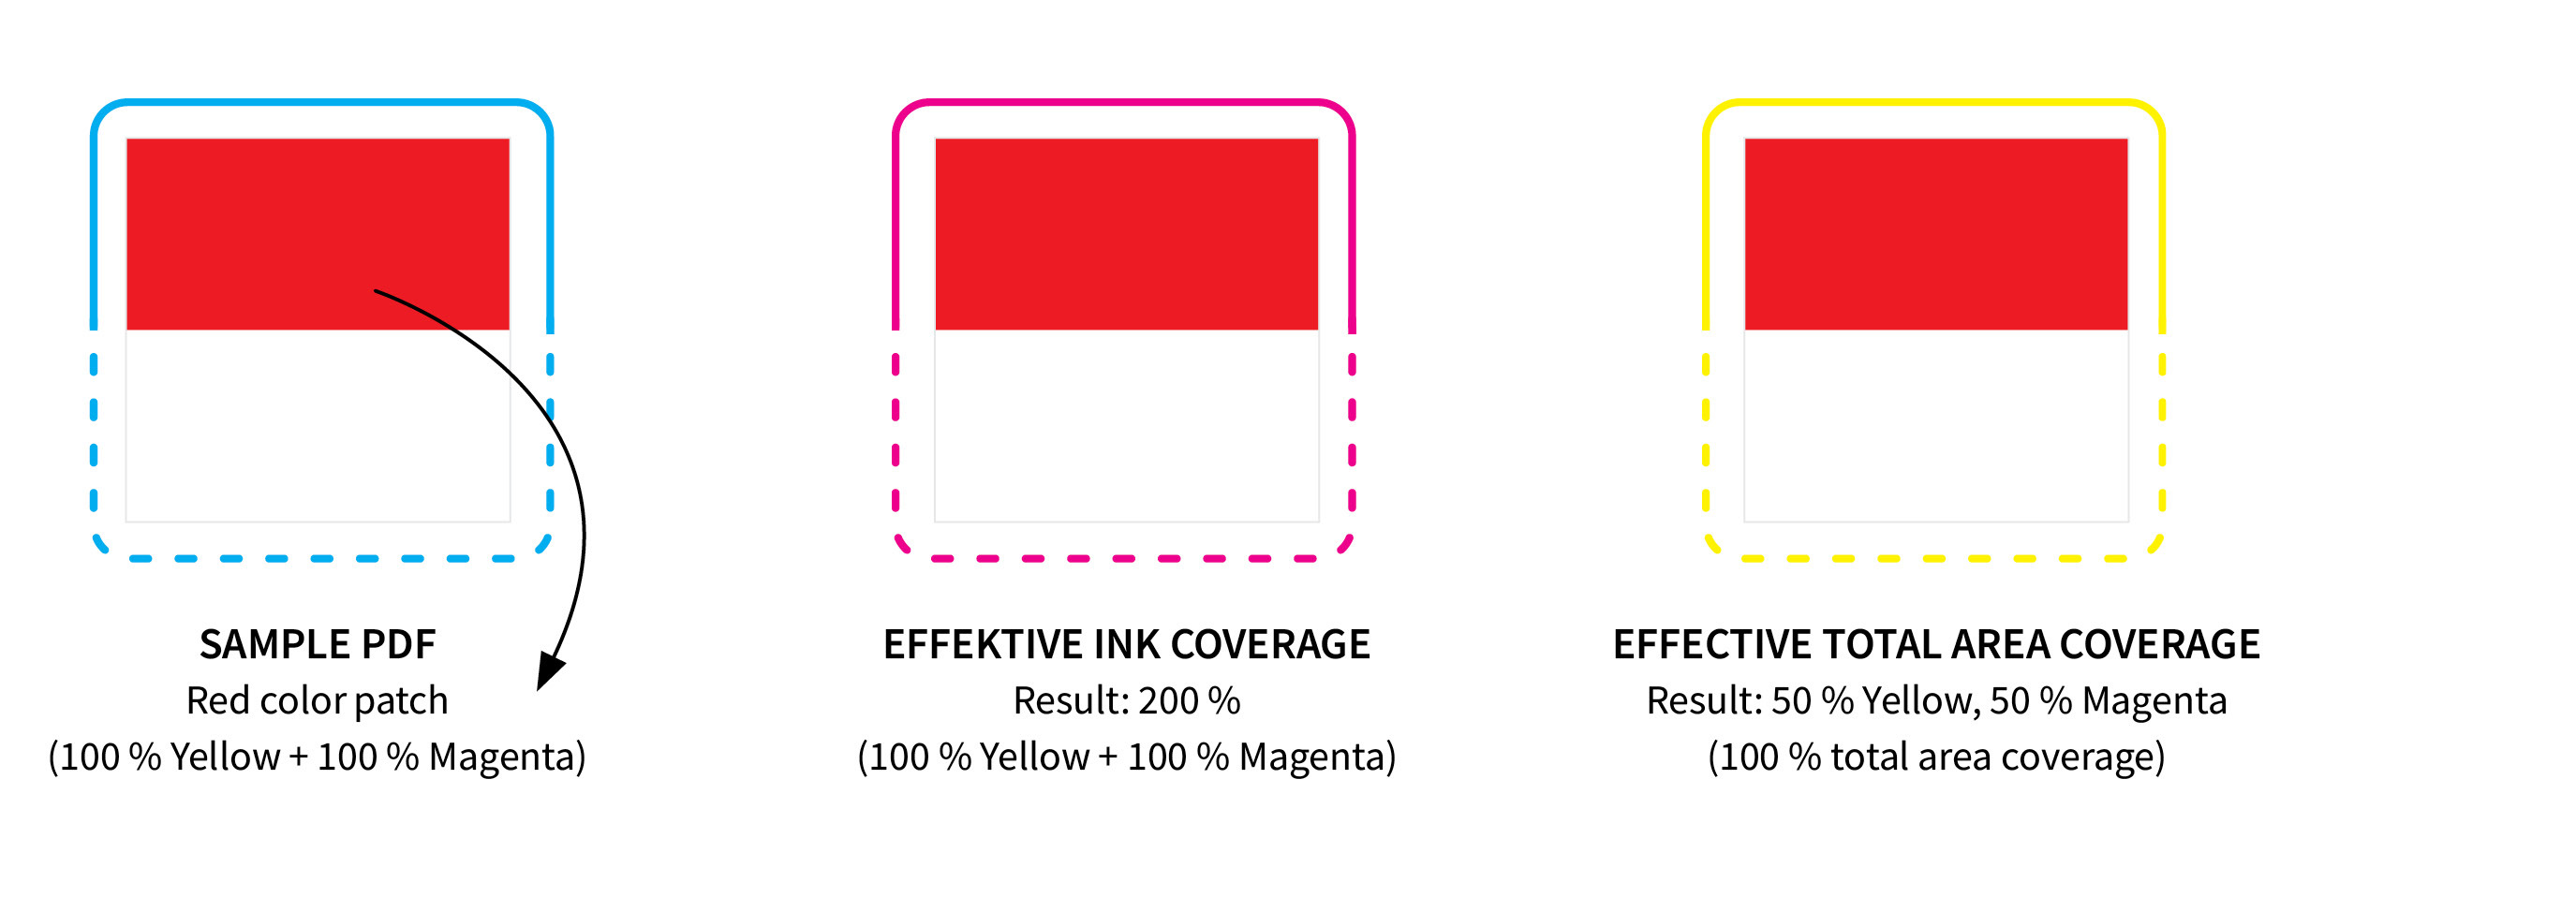
Half of the test file is filled with a red color patch (consisting of 100 % Yellow and 100 % Magenta). While "Effective ink coverage" adds up the ink amount per separation and reports 200 % as a check result, "Effective total area coverage" relates the ink amount per separation to the total area of the page. Since the color patch covers 50 % of the total page, only 50 % of both separations are needed for the PDF page. The check result is therefore 100 %.
Check properties that can be used to get information related to plates and separations
The "Effective ink coverage for separated plates” Check property is a variation of the “Effective ink coverage” Check. It allows you to limit the Check to one or more plates and while it is very similar, the use case is again completely different: It lets you determine if there is anything rendering on a specific plate at all.
"Effective ink coverage for registration color” determines whether registration color will be printed in the document.
The Check "Number of effectively non-empty plates” will count all effectively used plates. All plates with an ink covering an area above the threshold are counted as effectively non-empty plates.
"Helper" Check property to limit an ink coverage Check to a specific area on the page
Sometimes you may only be interested in specific areas of a PDF document to determine the ink coverage. The "Effective Ink Coverage - Limit to Custom Area" Check is a general "helper" property that can be combined with any of the other ink coverage Check properties, allowing you to limit your Check to a custom area. This means that you can check, for example, whether registration color is inside the TrimBox, or whether a certain area contains ink where no ink is allowed, such as the area where a barcode is printed.
Check property to determine the total area with a specified ink amount
Last but not least, we have the Check property "Area effectively covered by ink amount above threshold”. The name alone deserves an explanation: The focus is on the area that is covered by a specified ink amount. The Check will usually be used to identify pages that have only small areas of color as opposed to black and white pages. Here is an example:
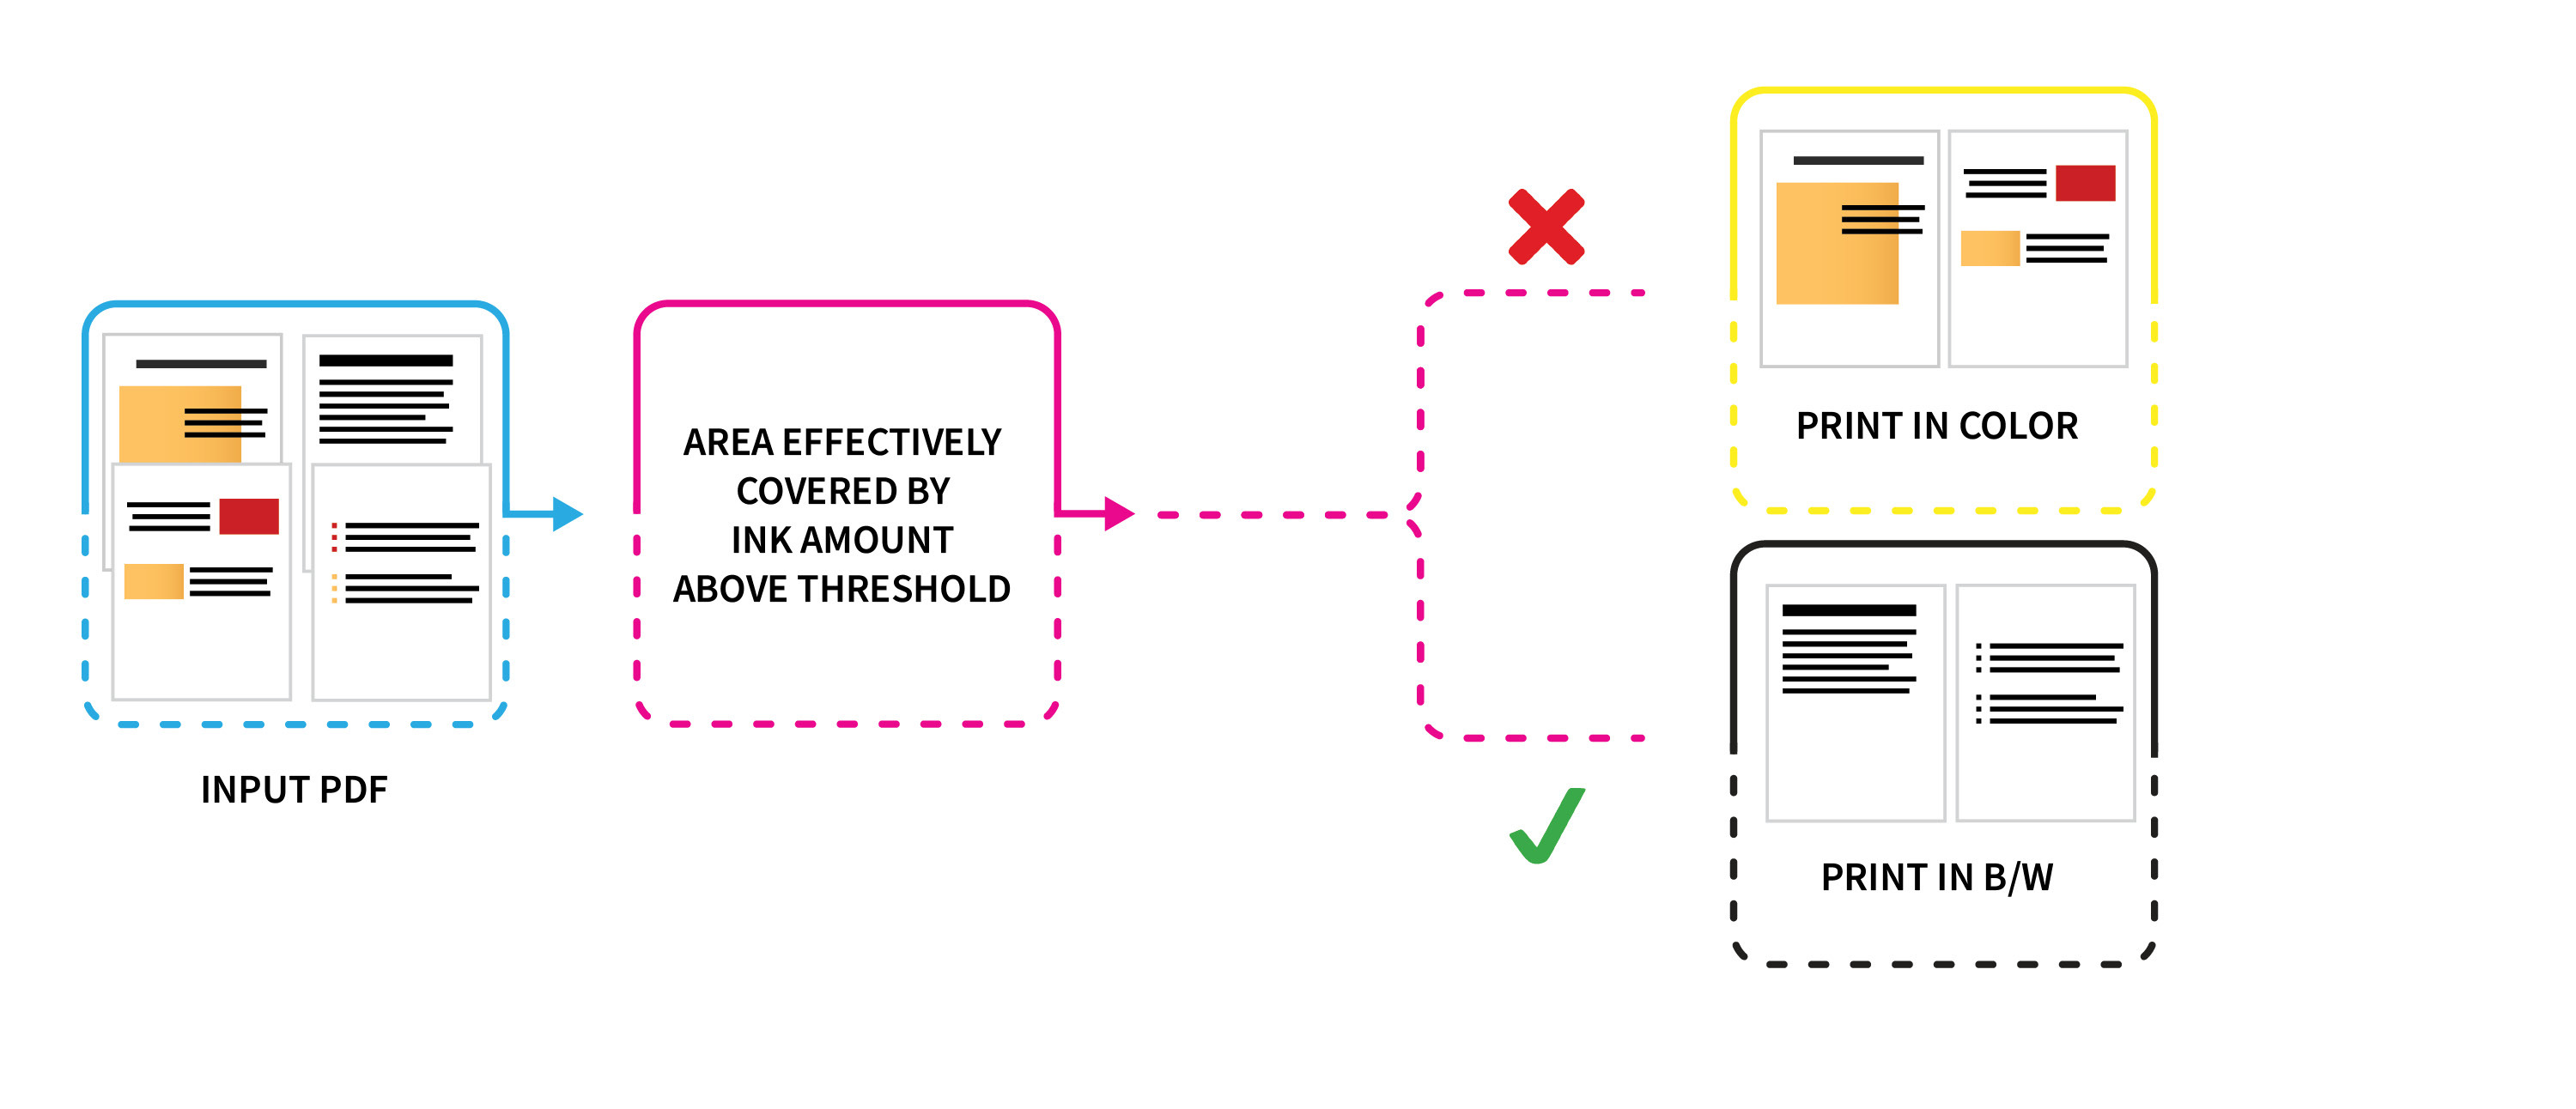
For digital printing, it is important to know how many pages of a PDF document use color and need to be printed in CMYK, and how many pages can be printed in black and white.
You can use the " Area effectively covered by ink amount above threshold " Check to find pages that contain only small areas of color or no color at all. For example, the Check could be configured as follows: If a page has a color area that is greater than 1 cm2 and filled with at least 10 % ink, a hit should be created (since we are only interested in the color areas, black ink has to be ignored and only C, M, Y are considered).
With that, all color pages can be identified automatically. All pages with significant color will generate a hit and are printed in color. All pages with no color or very small color areas (less than 1 cm2 on a page) will not generate a hit and can be printed with black only or converted to grayscale beforehand.
Internal rendering in pdfToolbox
As already mentioned, pdfToolbox uses internal rendering for all these Checks. When we talk about rendering, the resolution is obviously important as it defines how accurately the page will be rendered. In this context, pdfToolbox does not ask you to specify the resolution directly, but via the "sample size". All ink coverage Check properties have this parameter implemented. It is specified by a numeric value and a unit (pt, mm, cm, inch). To help you understand the sample size, here is an infographic:
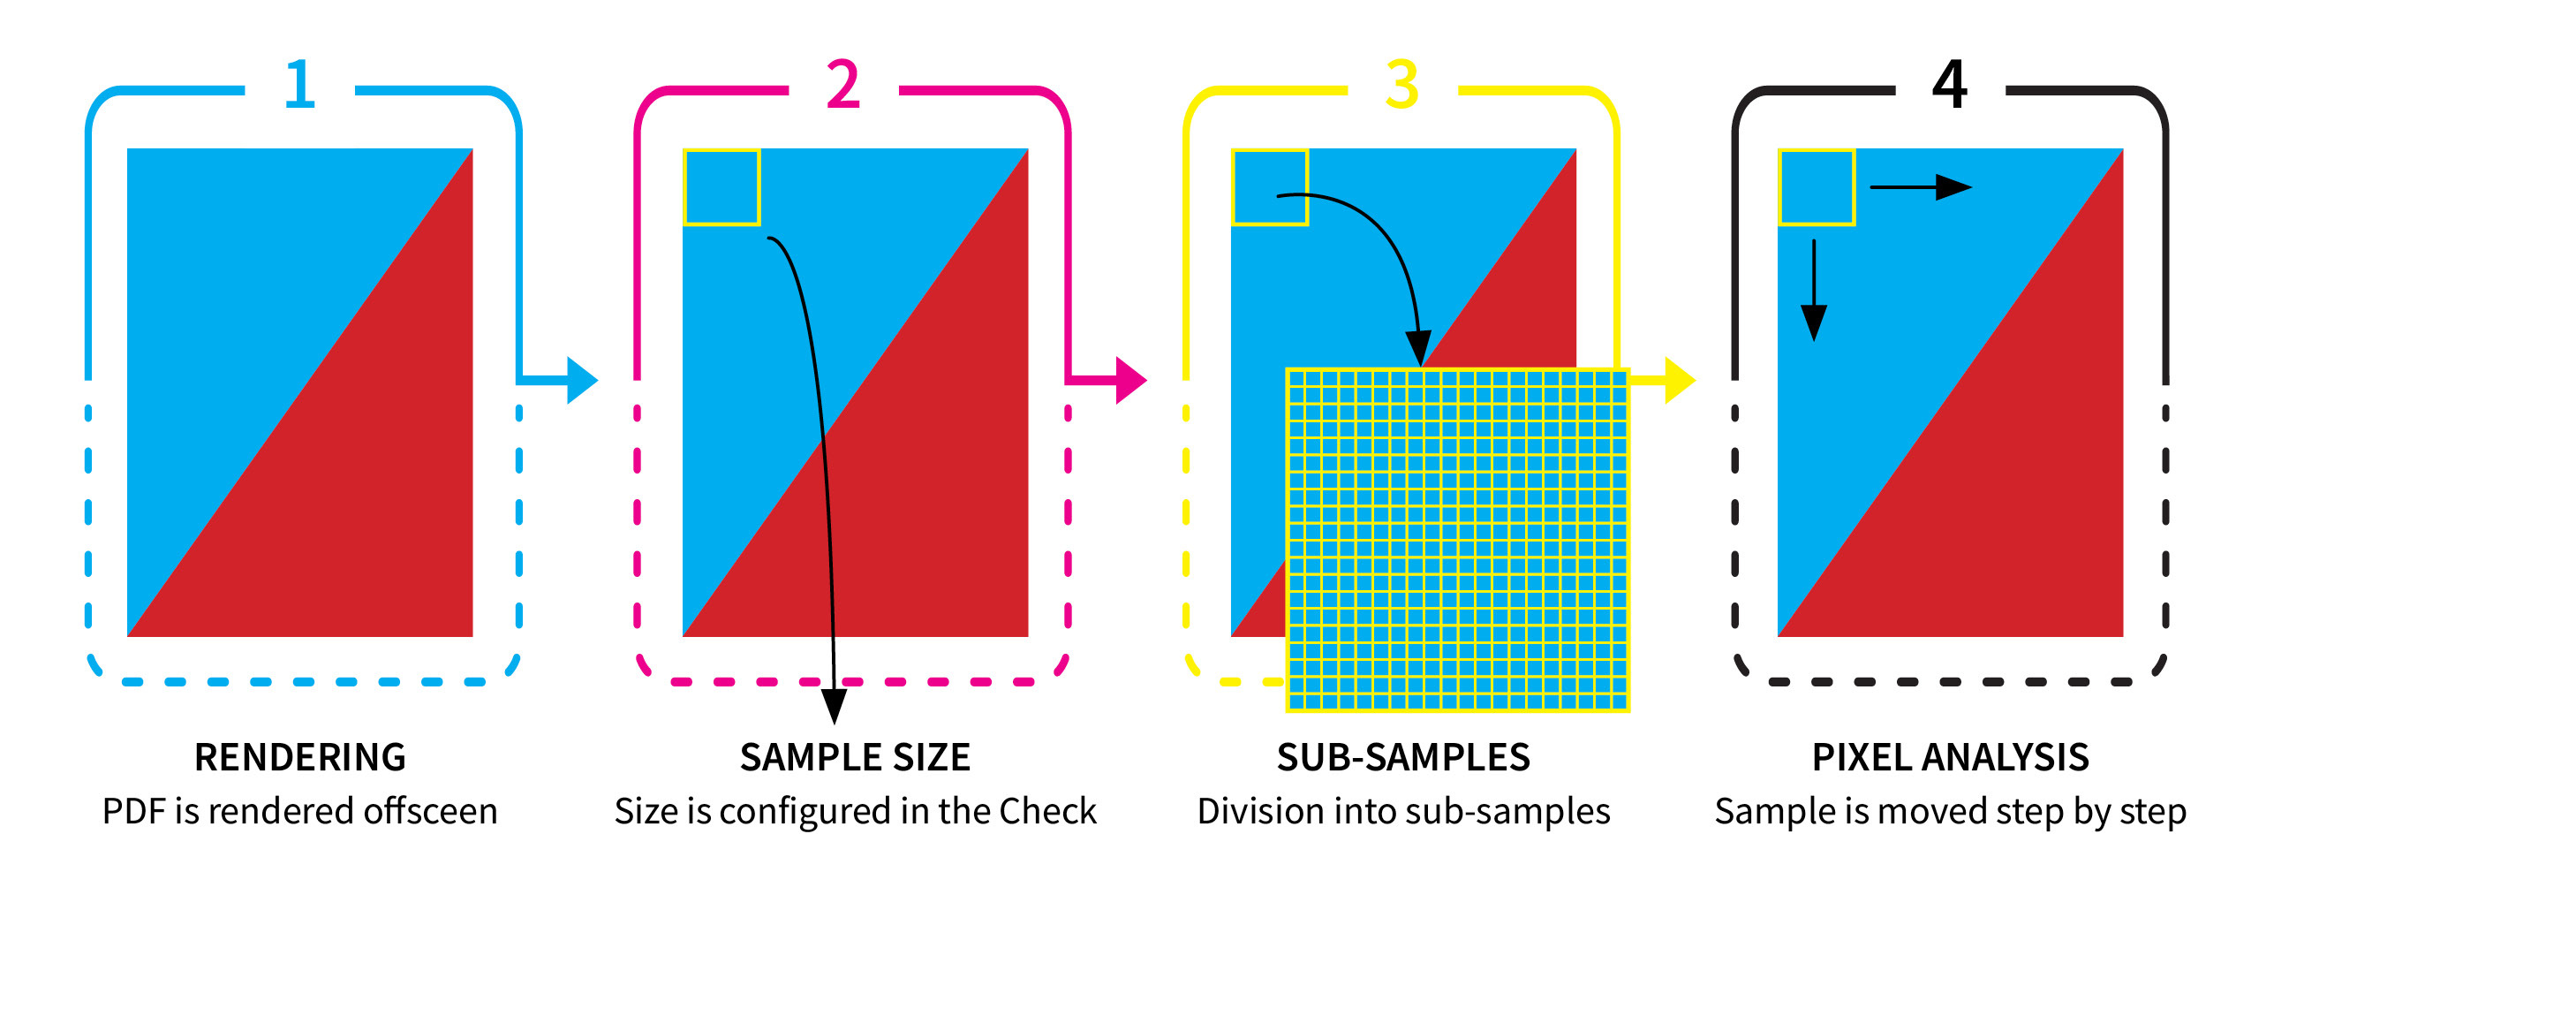
- The PDF is rendered off-screen.
- Sample size works similar to the aperture of a camera. A big aperture is similar to a large sample size and a small aperture is similar to a small sample size.
- Each sample is divided into 400 sub-samples, resulting in a pixel size that is one-twentieth of the sample size. The rendering resolution can then be derived from the calculated pixel size.
- To determine the intended value for a page, the sample is moved step by step across the entire page, starting at the top left corner and moving one pixel to the right in each step for all rows of pixels either until the ink coverage exceeds the threshold or until all pixels have been evaluated. In most cases, a sample size of 10 millimeters is recommended.
Want to know more?
Our online documentation gives you a more technical perspective on each Check property so you can easily integrate them into your workflow.