What is a white underlay and why do I need it?
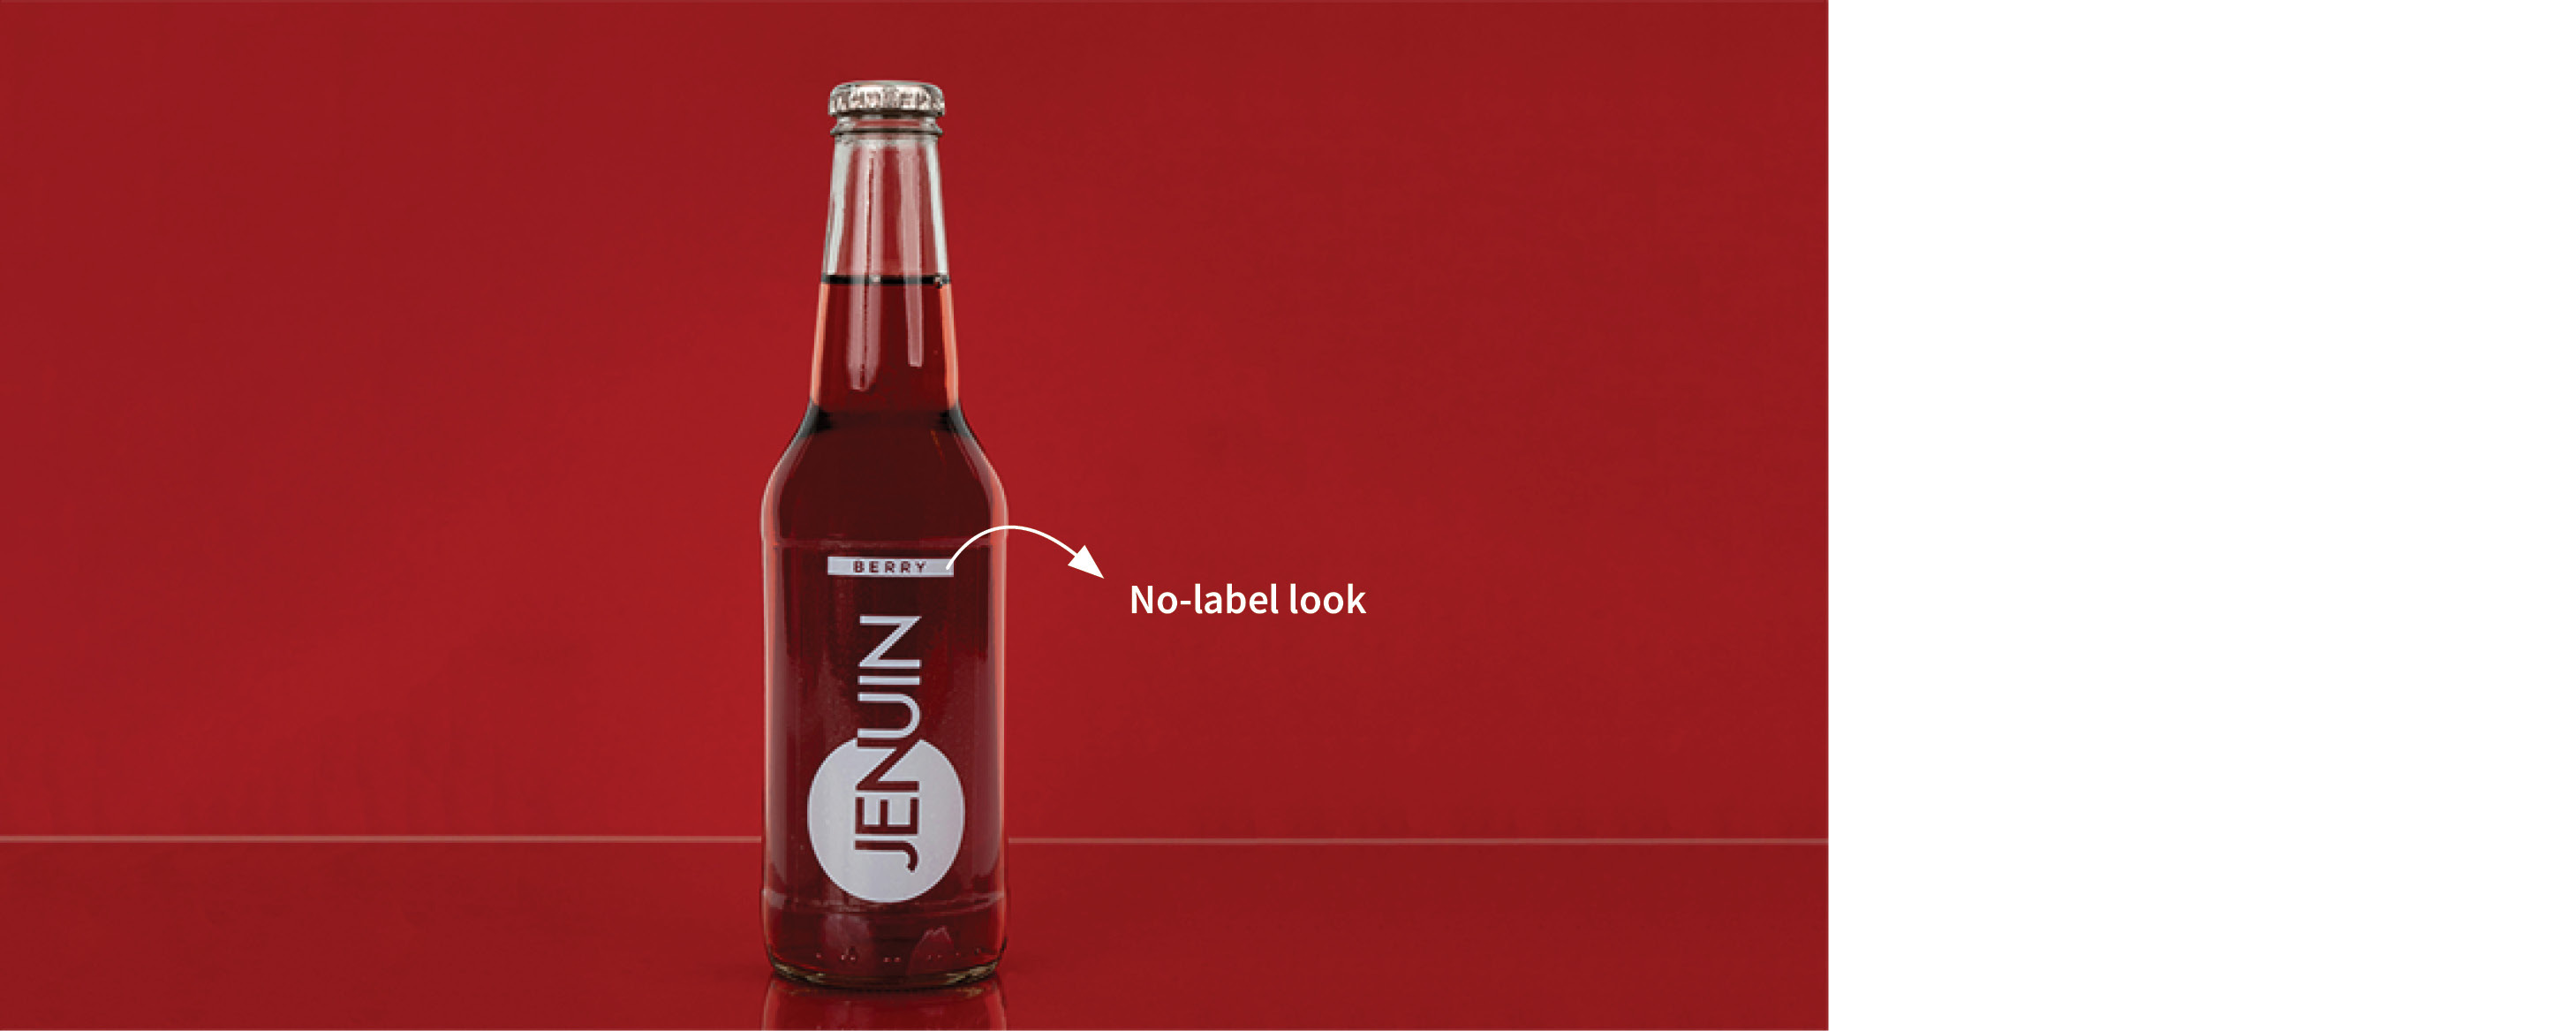
In the world of product design, the "no-label look" is well established. This design approach refers to a trend where transparent labels are used so that they appear virtually invisible on the final product. This is done by printing the labels on crystal-clear materials, creating the illusion that the design is printed directly onto the surface of the product (see the example above). But compared to direct printing, the use of transparent labels offers greater flexibility and lower implementation costs. Achieving this aesthetic, however, comes with a challenge: Printing colors and white elements opaquely on transparent materials is not easy. Due to the translucent nature of inks, they would appear muddy or too light. This effect obviously depends on the background the label is applied to and the type of ink used, but in any case it is strong enough that it must be avoided. In practice that is done by printing a white underlay.
Not all designers are aware of this technical requirement and even if they are, the way the white underlay is created may depend on the actual printing process. So, quite often the print service provider has to derive a white form from the layout - ideally in a fully integrated automated process. pdfToolbox offers several methods to automatically add a white underlay for different use cases. Let us have a look at the different possibilities.
1. Method: Creating a white underlay using the "Create and Apply Shapes" Fixup
The first implemented and probably most known method to add a white underlay to a PDF file is the "Create and Apply Shapes" Fixup. If you're not familiar with pdfToolbox's shape technology, here's a quick explanation: It allows you to derive new page objects from existing content or page information. These "shapes" can be filled or stroked, and they can be added before or behind the actual page content.
To automatically create a white underlay using the "Create and Apply Shapes" Fixup, you'll need to configure two things in the Fixup. First, you create the shape, which can reference page geometry boxes, existing page content, or vector elements. The size of the shape can be adjusted to make it slightly smaller or larger than the print content. The second step is to apply the shape, where you can define the parameters of the white underlay according to your specific job requirements, including spot color values, spot color name, whether to place it on a new layer, overprint mode, and so on.
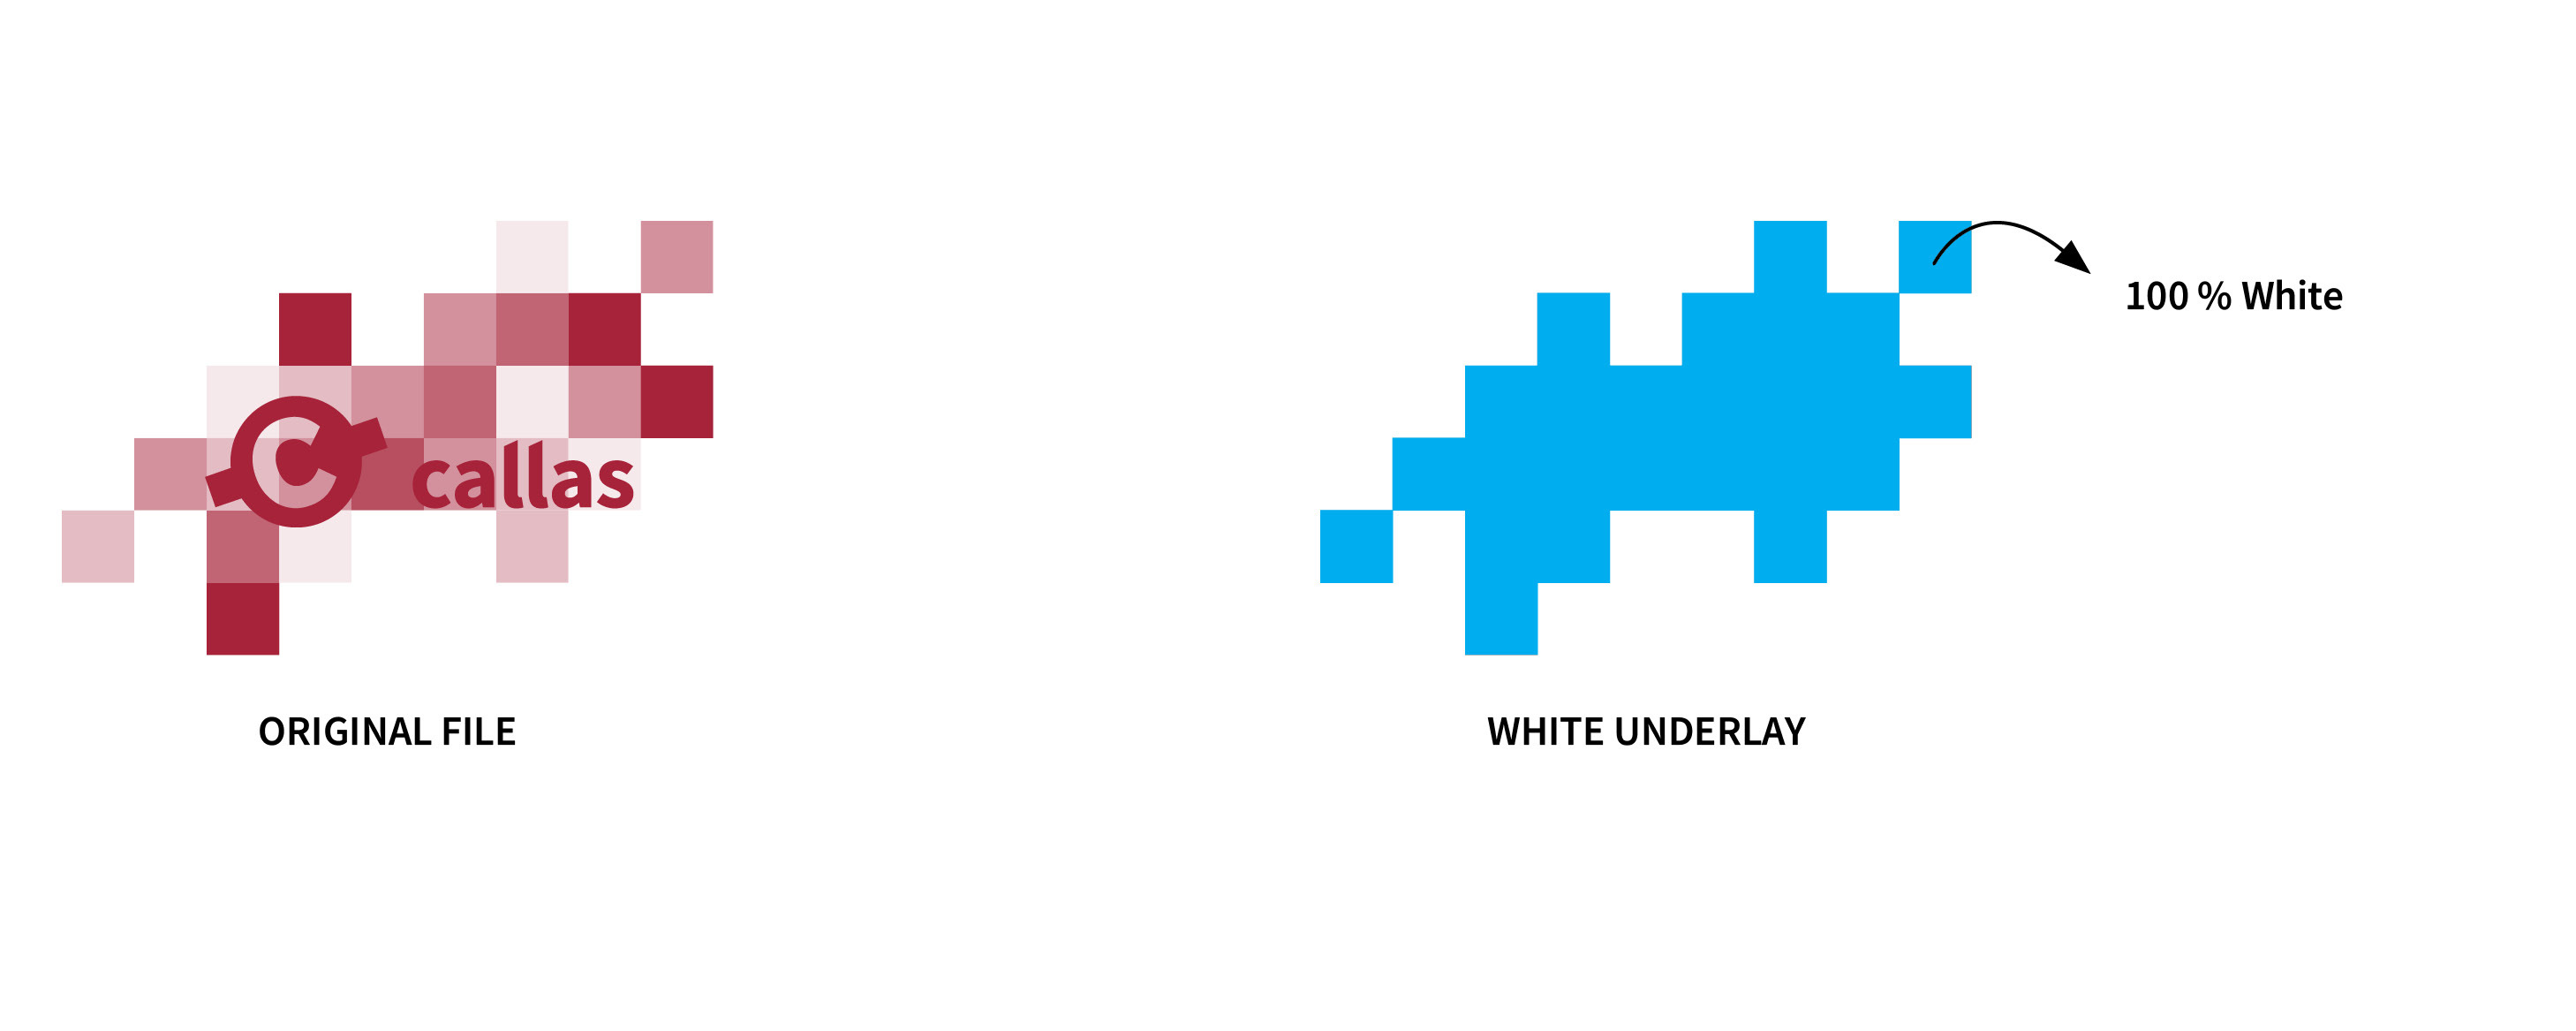
Here's an example of a white underlay that was generated using the "Create and Apply Shapes" Fixup: In this case, the entire print content of the page has a 100 % spot color white underlay.
2. Method: Creating a white underlay based on ink amount
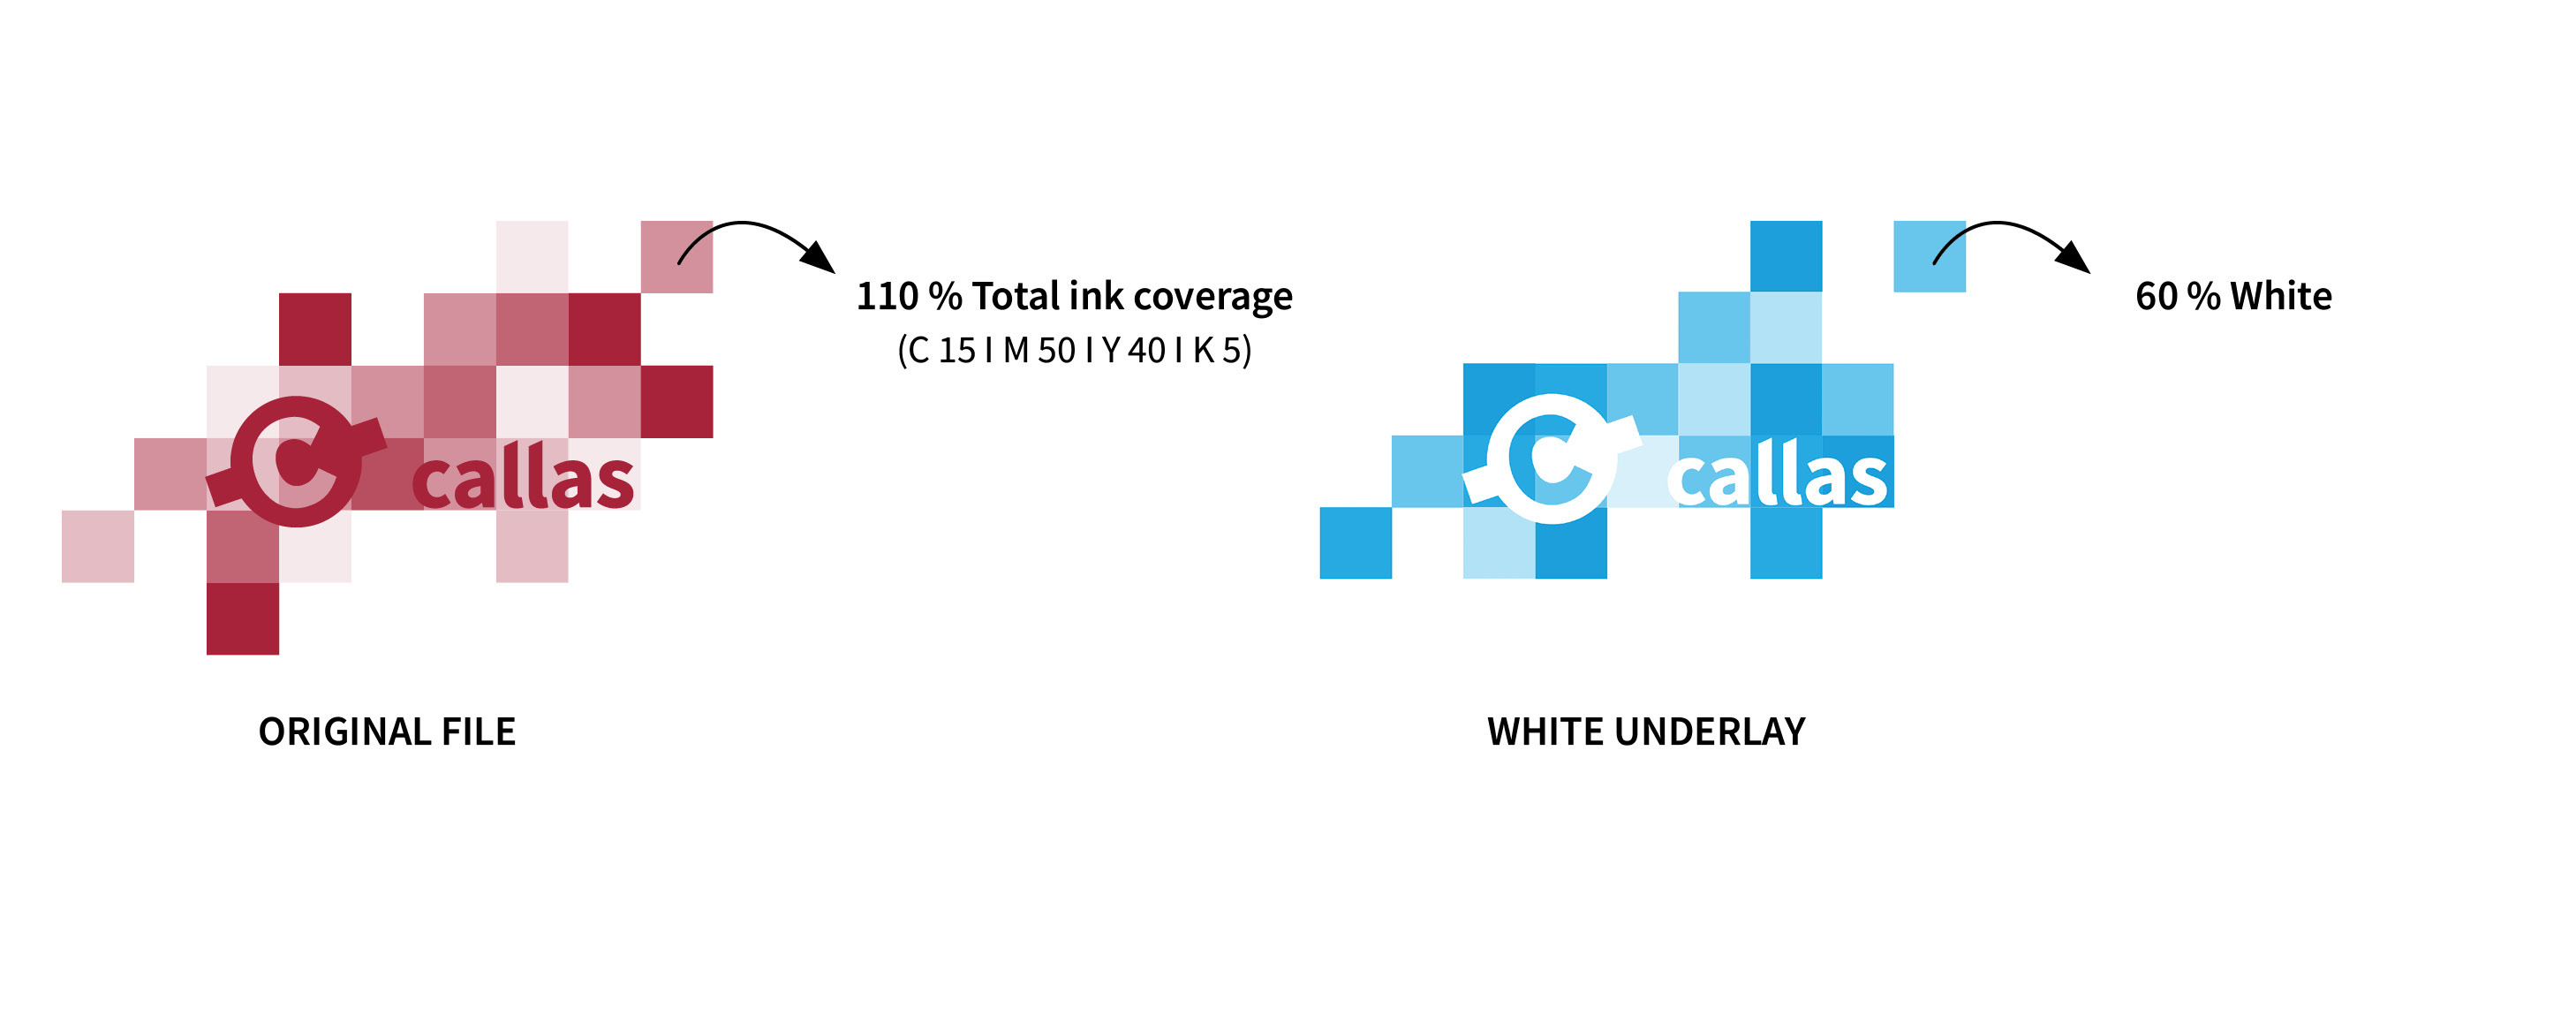
The first approach has one downside: White ink is more expensive than the other inks, so the production cost of such an underlay may be unnecessarily high. In some print processes, you would only need white where there is not already a certain amount of ink. If an area already has 200 % ink or more, a white underlay will usually not improve anything and could even cause production problems due to the large amount of ink (including white).
In order to print only the amount of white that is really needed, you would want more white in the light areas of the print content and less in the darker areas where there is already a higher ink amount. This means that the amount of ink in an area of the white form depends on the amount of (other) ink in that area.
In our example layout the dark red rectangles and the logo have more than 200 % ink, which is sufficient. With a mapping curve, we can define that once the ink amount reaches 200 %, no white underlay is needed. Very light areas, up to about 50 % ink coverage, should, however, be printed on 100 % white, and all values between 50 % and 200 % ink coverage will result in a spot color value that gradually goes down from 100 % to 0 % (via linear interpolation).
The pdfToolbox Fixup "Create spot color plate based on ink amount" allows you to specify all of that.
3. Method: Deriving a white underlay from softmasks
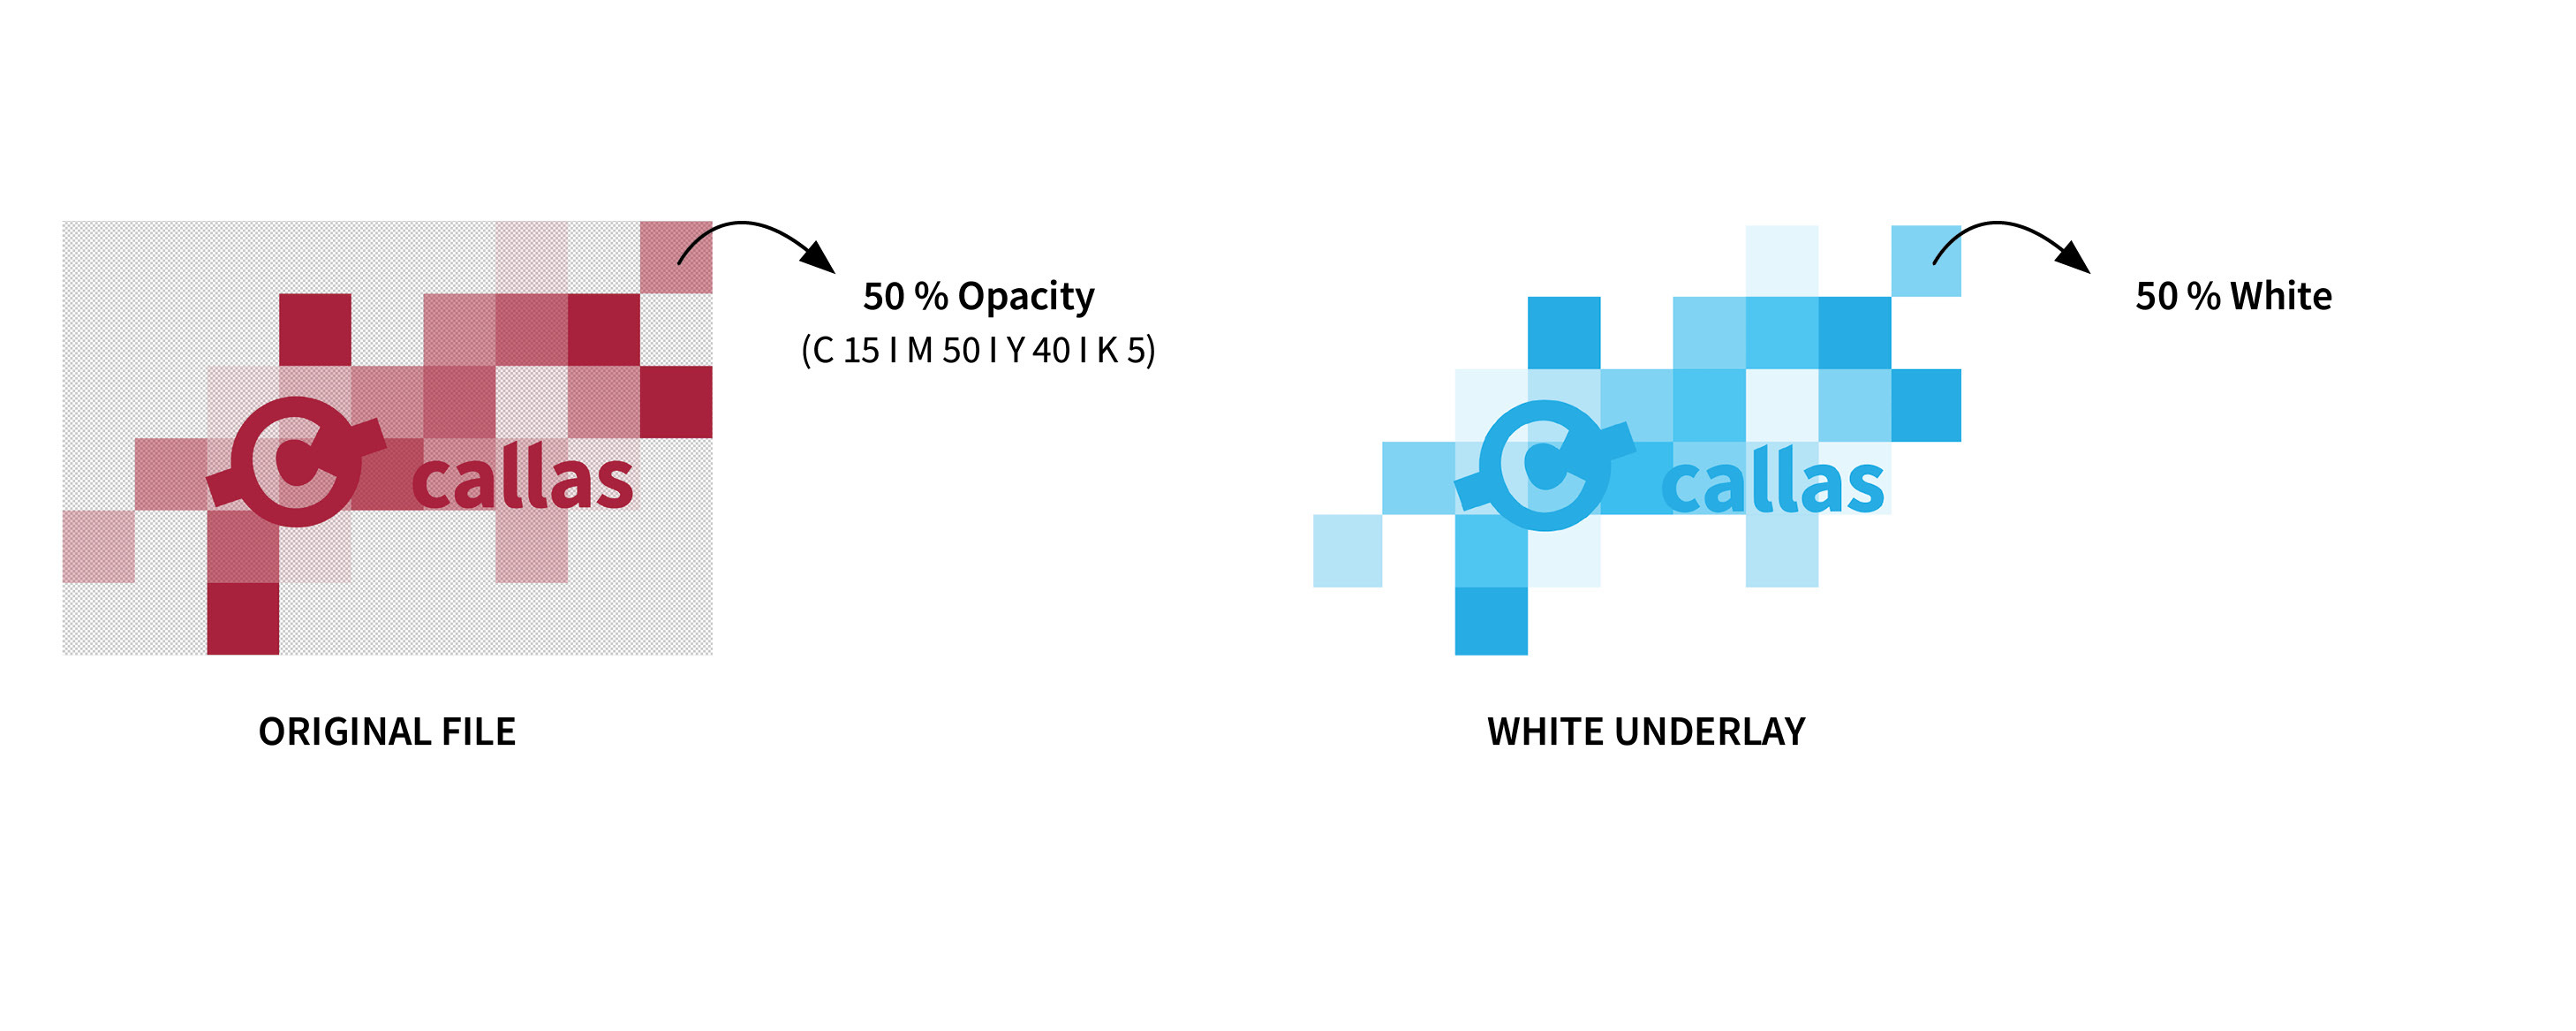
The pdfToolbox 14.4 release introduces a new Fixup that uses another method to create white underlays: "Derive spot color from softmasks". This method is special and is usually used for PDFs derived from PNG files with an alpha channel. The alpha channel will end up as a softmask in the PDF after the file format conversion. The Fixup can be used with all PDFs that contain a softmask.
If your design uses transparency, you may want the transparent objects to appear transparent on the background. This means that you want less opaque white in transparent areas. The result is somewhat the opposite of the previously mentioned Fixup: You may have less white in light areas.
"Derive spot color from softmasks" creates a new image with a specified spot color (in our case White) based on the softmask: In fully transparent areas of the original image, no white underlay is added. For partially transparent objects, the white underlay adjusts to the degree of transparency, ensuring an accurate representation of the transparency levels.
Let us look at our example: The input file now has a softmask. The background is transparent, and some of the objects in the background also have different levels of transparency. This Fixup uses those transparency levels from the softmask for your white underlay: Where the existing page content has e.g. an opacity of 50 %, the spot color "White" will also have an opacity of 50 %.
In summary, the choice of the most appropriate method for creating the white underlay depends on the specific requirements of your print production. If you're interested in using these Fixups and integrating them into your workflow, you can find detailed configuration instructions for each Fixup in our online documentation:
- "Create and apply shapes"
- "Create spot color plate based on ink amount"
- "Derive Spot color from softmasks"